I think most of us had a chance to view Neil’s buddipole that he purchased at Dayton and used to make a couple of QSOs with. I know I admired the quality, the fact that it didn’t weigh a ton and was super easy to store and transport.
I’d tried various portable antennas since then myself, but wanted something more robust and proven to take portable on my own. So, I opted for the Buddistick – the vertical version of the buddipole. Here’s my initial thoughts of the product.
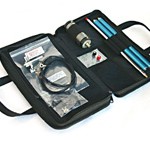
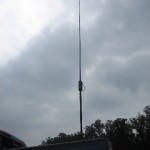
The big thing that first stood out to me when it arrived was how lightweight the entire antenna was. I ordered the deluxe package which included the antenna, clamp and tripod, radial wire and the very nice carrying case. The whole thing weighed 1 lb. Total length of the antenna when deployed is 98 inches. The entire bag is small enough to be packed in another bag if you needed to for transport. It covers 7-54 MHz and will take up to 250 watts. All good so far!
Tuning – at first, turned out to be a little more than I expected. I’d watched Neil tune the buddipole with relative ease without a SWR analyzer. With the SWR analyzer in hand on two separate evenings, I was having trouble getting it to resonate anywhere other than 40m. Granted, I was trying to do this in the dark with the mosquitoes, which I’m certain had a big impact. So I waited until a better day, and shot Budd, W3FF an email to get some
for the various bands. He sent them to me overnight, but I’m just not sure why that info isn’t included with the antenna to begin with.
Anyway, with those numbers in hand, I spent about an hour with the antenna and the analyzer, and had it operational on all HF bands from 40-10 a couple of times. The recommended tap site coupled with changing the length of the radial by winding or unwinding it brought the SWR down everywhere I would ever want to operate while portable. Thank goodness for the SWR analyzer, it gave me a chance to see what winding a couple of inches off of the radial would do for me.
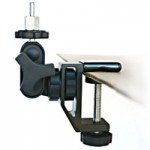
Mounting and operating part 1 -Using the clamp mount, I decided to mount it on the back of my truck for further testing and broke out my SGC SG-2020 portable rig. This same clamp could be used to mount to a picnic table, railing, etc. I spent a little over an hour on 20 meters running the rig at full power (20w). I worked MW0ZZK, ON7CD, CN8KD, (voice) and CT1GND, CX4CR and TF2CT (psk). Wow, I was really impressed to make that many QSOs and that quality QSOs all from the driveway!! But I was hungry, so I took it all down and went inside.
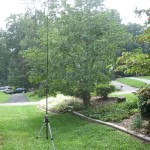
Mounting and operating part 2 – dipole comparison -I decided the next day that I was going to put it up in the back yard, and use my camera tripod to elevate it off of the ground instead of the mini tripod that came with it. I put it together and briefly adjusted the radial length so the antenna would perform well on 20 meters. This time I ran the coax into the shack and ran 100 watts into it. While comparing some signals heard with the 20meter dipole at 35 feet up, there was usually about 1 S unit difference higher on the dipole. Signals to the south at that particular moment were equally strong, which made geographic sense with the house blocking EU signals a little more. Some of the EU signals dropped off several S units to the noise, unlike the day before. I quickly had one RTTY and one PSK contact with XE1L and YV5OHW. Reports were good both ways, and the signals were holding up quite well. Once again, I was happy.
So whats next? My plan is to take this antenna and the SGC rig to the beach and to the mountains very soon for more portable DXing. But my initial impression is that this is THE portable antenna for ease in setup and performance! I’ll have more to say about it and the SGC rig since I really haven’t said much about it but I’m really having a good time operating it as well. Stay tuned for more thoughts, reviews and install pics. I also posted some more pics in a photo album.


